<?xml version="1.0" encoding="utf-8"?><feed xmlns="http://www.w3.org/2005/Atom" ><generator uri="https://jekyllrb.com/" version="3.10.0">Jekyll</generator><link href="https://joshfrye.com/feed.xml" rel="self" type="application/atom+xml" /><link href="https://joshfrye.com/" rel="alternate" type="text/html" /><updated>2026-07-21T15:34:05+00:00</updated><id>https://joshfrye.com/feed.xml</id><title type="html">joshfrye.com</title><subtitle>Software Engineering, Platform, DevOps, Cars, and Hardware Hacking.</subtitle><author><name>Josh Frye</name></author><entry><title type="html">Diagnosing Wheel Imbalance with a GoPro and FFmpeg</title><link href="https://joshfrye.com/blog/2026/07/diagnosing-wheel-imbalance-with-ffmpeg/" rel="alternate" type="text/html" title="Diagnosing Wheel Imbalance with a GoPro and FFmpeg" /><published>2026-07-18T14:00:00+00:00</published><updated>2026-07-18T14:00:00+00:00</updated><id>https://joshfrye.com/blog/2026/07/diagnosing-wheel-imbalance-with-ffmpeg</id><content type="html" xml:base="https://joshfrye.com/blog/2026/07/diagnosing-wheel-imbalance-with-ffmpeg/"><![CDATA[<p>There is nothing quite as annoying as a highway-speed vibration that you just can’t track down. You’ve had the wheels balanced, the alignment checked, and yet, at 70 MPH, the steering wheel still dances.</p>

<p>Recently, I decided to stop guessing and start measuring. Using a GoPro mounted under the car and some <code class="language-plaintext highlighter-rouge">ffmpeg</code> magic, I was able to visually isolate exactly which wheel was causing the problem.</p>

<p>Here is the nerd write-up on how to use frame differencing to diagnose mechanical vibrations.</p>

<h2 id="the-setup">The Setup</h2>

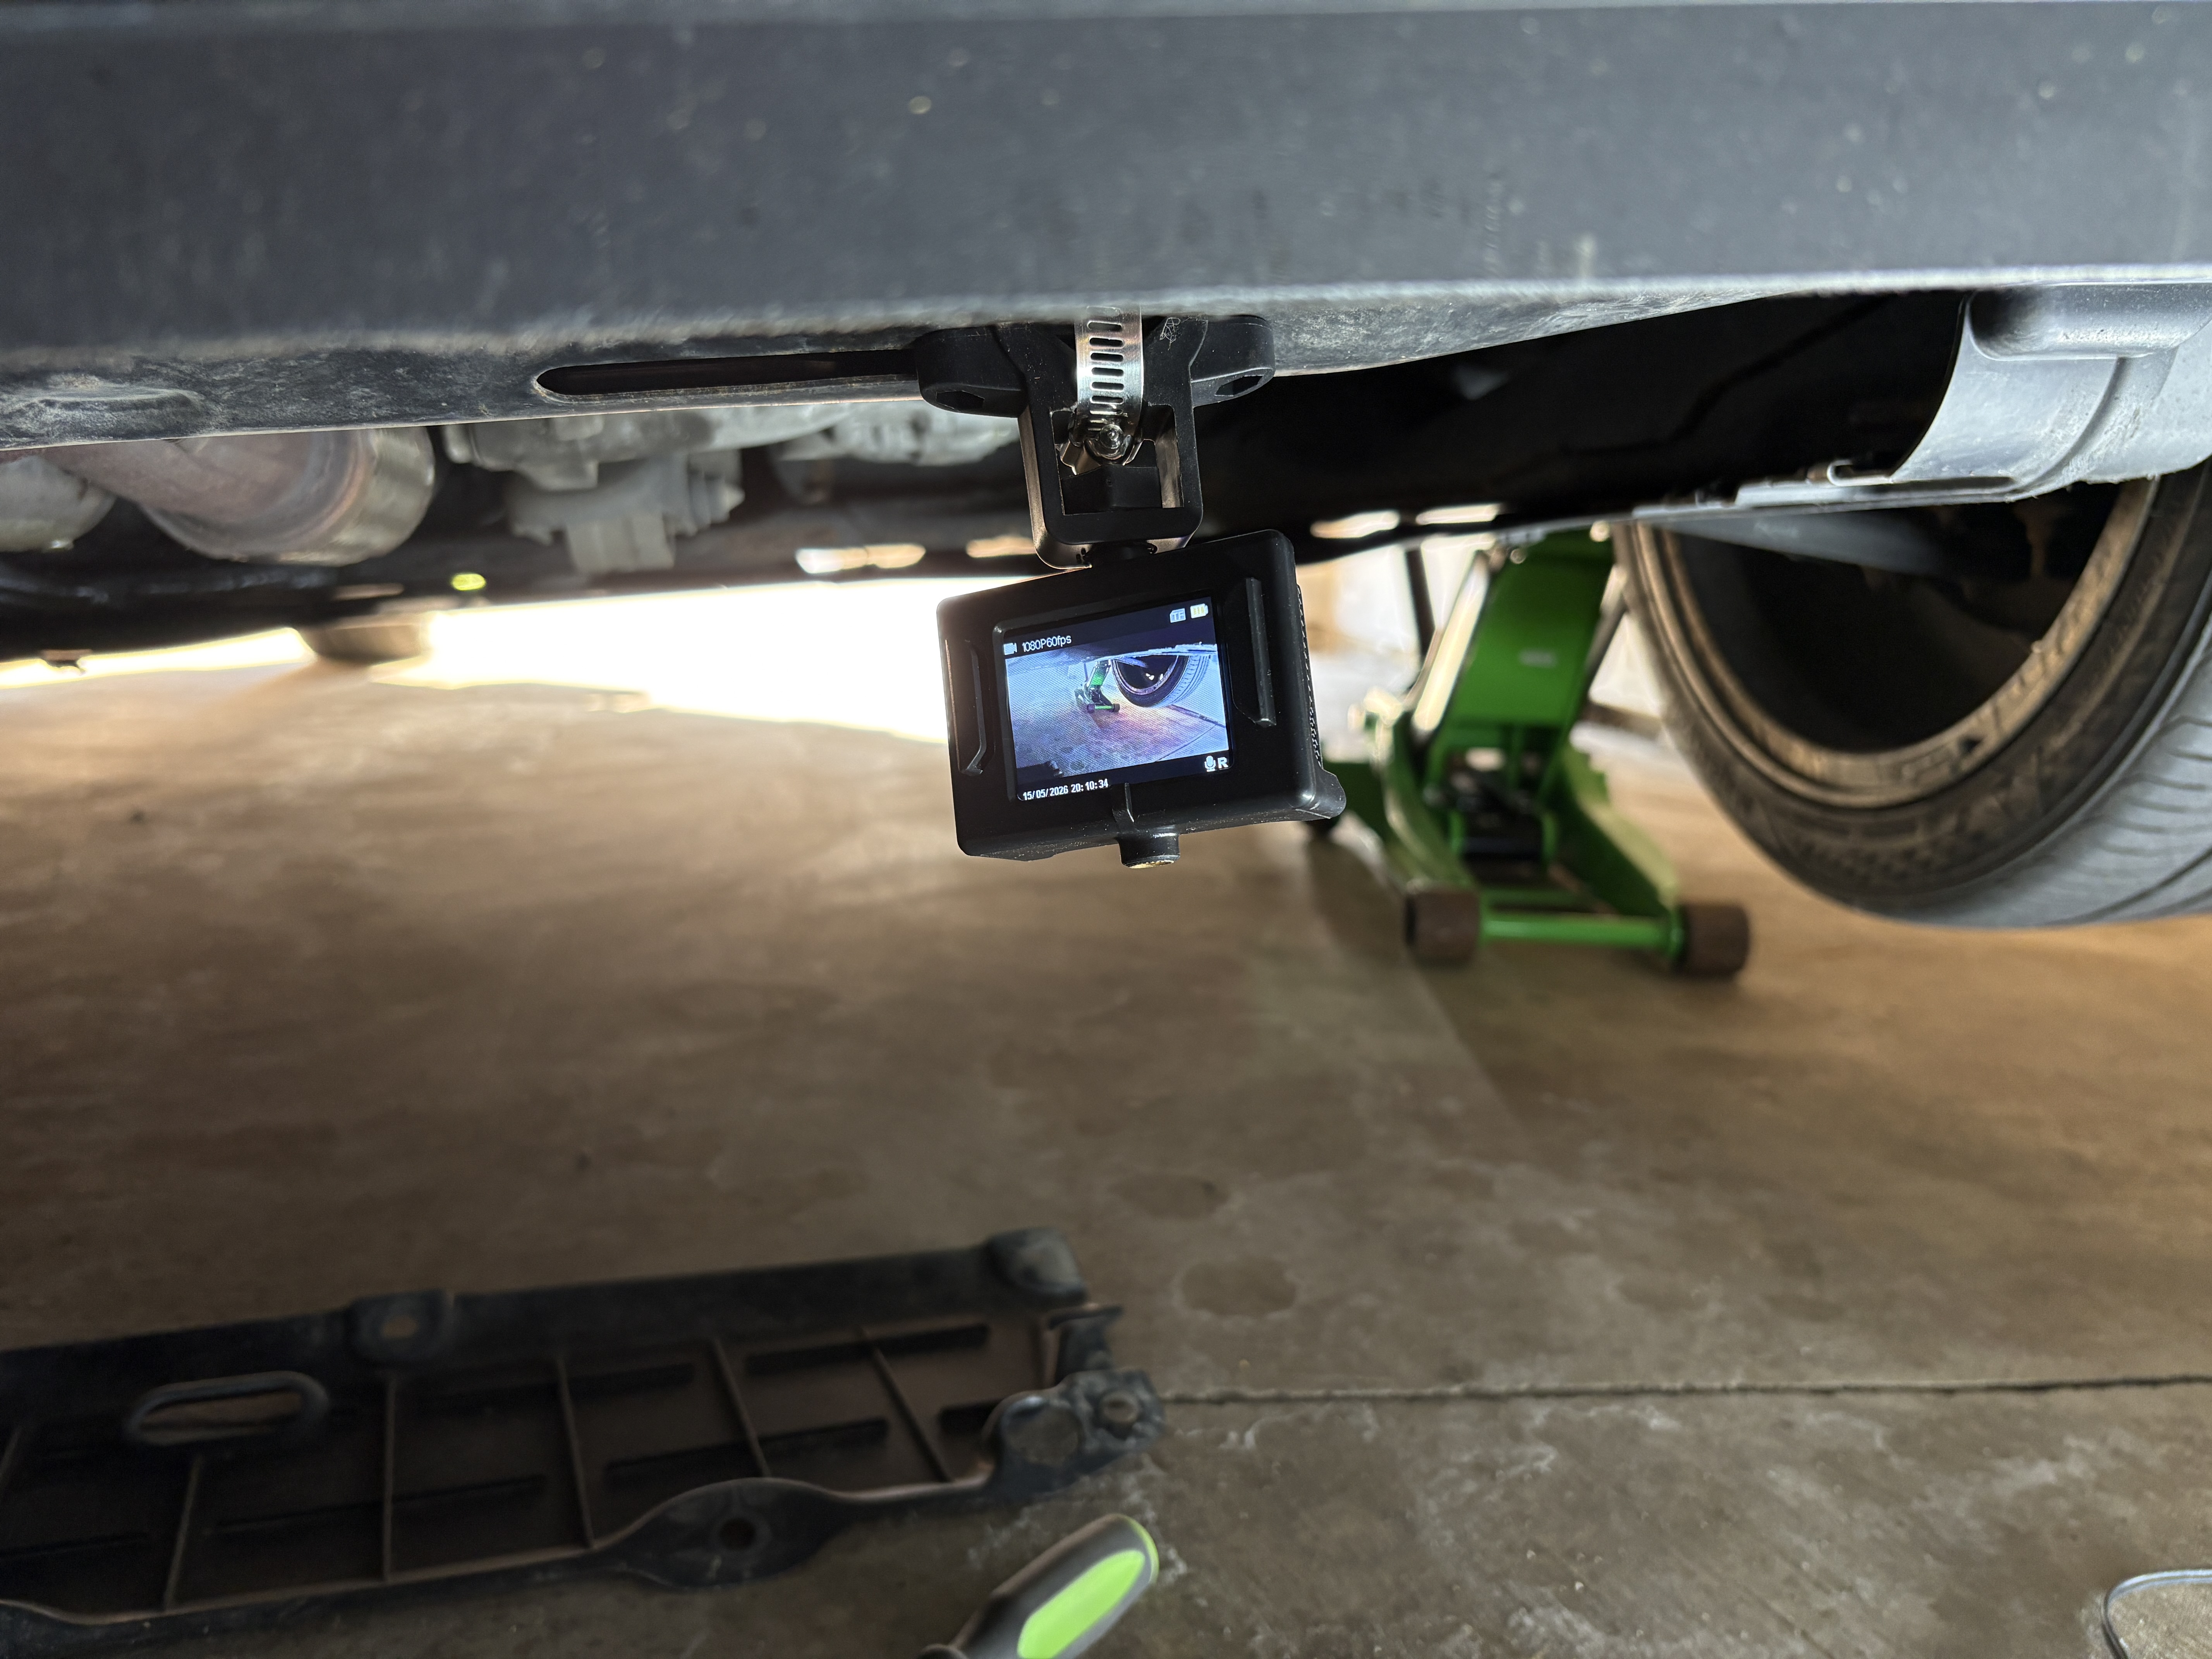
<p>I mounted a GoPro to the frame of the car, pointed at the suspension assembly. The goal was to capture high-frame-rate footage (60fps or higher is best) of the wheel while driving at the speed where the vibration is most prominent.</p>

<p><img src="/assets/images/posts/wheel-imbalance/img_2416.jpg" alt="GoPro Under Car Setup" /></p>

<p>Once I had the footage, the real work began.</p>

<h2 id="phase-1-metadata-and-overview">Phase 1: Metadata and Overview</h2>

<p>First, we need to understand what we’re working with. <code class="language-plaintext highlighter-rouge">ffprobe</code> is the go-to for extracting metadata.</p>

<div class="language-bash highlighter-rouge"><div class="highlight"><pre class="highlight"><code>ffprobe <span class="nt">-v</span> error <span class="nt">-show_format</span> <span class="nt">-show_streams</span> input_video.mov
</code></pre></div></div>

<p>I also like to generate a contact sheet of thumbnails to quickly find the sections of video where I was actually at highway speed.</p>

<div class="language-bash highlighter-rouge"><div class="highlight"><pre class="highlight"><code><span class="nb">mkdir</span> <span class="nt">-p</span> thumbnails
ffmpeg <span class="nt">-i</span> input_video.mov <span class="nt">-vf</span> <span class="s2">"fps=1/60"</span> thumbnails/thumb_%03d.jpg
</code></pre></div></div>

<h2 id="phase-2-visual-evidence">Phase 2: Visual Evidence</h2>

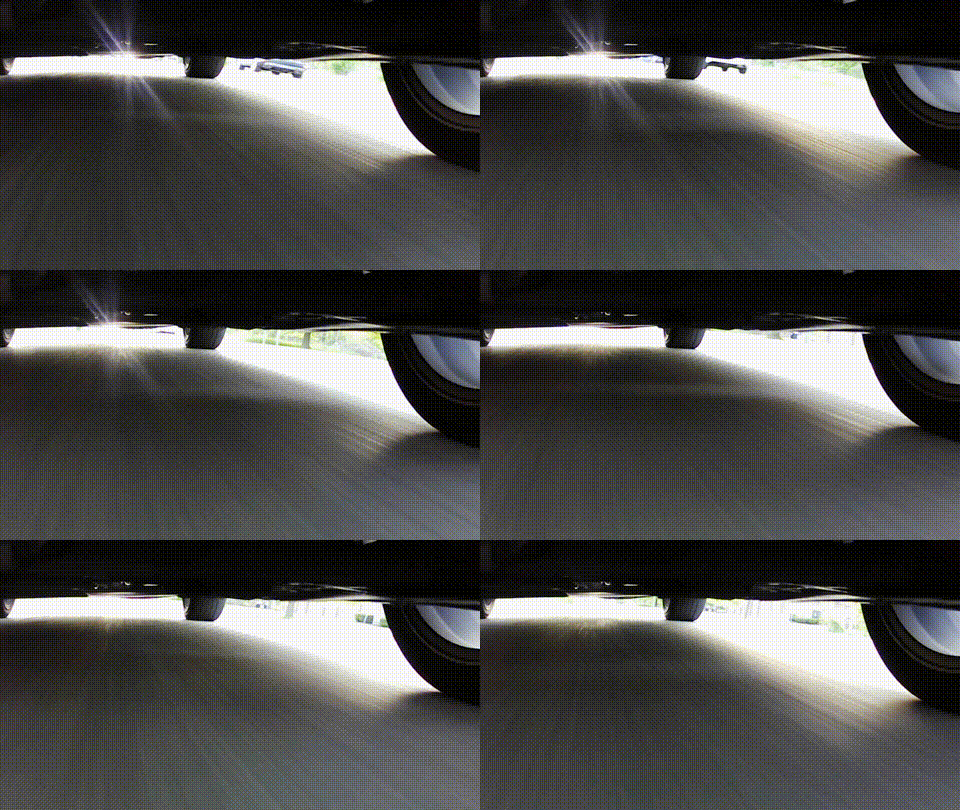
<p>Before diving into advanced filters, a simple scaled-down GIF can help confirm you have the right angle.</p>

<div class="language-bash highlighter-rouge"><div class="highlight"><pre class="highlight"><code>ffmpeg <span class="nt">-ss</span> 00:05:30 <span class="nt">-t</span> 5 <span class="nt">-i</span> input_video.mov <span class="nt">-vf</span> <span class="s2">"scale=480:-1"</span> <span class="nt">-r</span> 15 <span class="nt">-f</span> gif observation.gif
</code></pre></div></div>

<p><img src="/assets/images/posts/wheel-imbalance/video1_later.gif" alt="Driver Side Observation" /></p>

<h2 id="phase-3-advanced-diagnosis-vibration-isolation">Phase 3: Advanced Diagnosis (Vibration Isolation)</h2>

<p>This is where it gets interesting. To prove that a movement is a <strong>mechanical vibration</strong> rather than just a <strong>road bump</strong>, we use <strong>Frame Differencing</strong>.</p>

<p>Road bumps are irregular and usually affect the whole frame. A mechanical imbalance is periodic and constant. By subtracting the previous frame from the current one, we can highlight only the pixels that are changing.</p>

<h3 id="the-magic-command">The Magic Command</h3>

<div class="language-bash highlighter-rouge"><div class="highlight"><pre class="highlight"><code>ffmpeg <span class="nt">-y</span> <span class="nt">-ss</span> <span class="o">[</span>start_time] <span class="nt">-t</span> 3 <span class="nt">-i</span> input_video.mov <span class="se">\</span>
  <span class="nt">-vf</span> <span class="s2">"format=gray, tblend=all_mode=difference, scale=480:-1"</span> <span class="se">\</span>
  <span class="nt">-r</span> 15 <span class="nt">-f</span> gif vibration_diff.gif
</code></pre></div></div>

<ul>
  <li><code class="language-bash highlighter-rouge"><span class="nv">format</span><span class="o">=</span>gray</code>: Strips color to focus on intensity.</li>
  <li><code class="language-bash highlighter-rouge"><span class="nv">tblend</span><span class="o">=</span><span class="nv">all_mode</span><span class="o">=</span>difference</code>: The core logic. It highlights changes between consecutive frames.</li>
</ul>

<h3 id="interpreting-the-results">Interpreting the Results</h3>

<p>In a difference map:</p>
<ul>
  <li><strong>Road Bumps:</strong> Appear as sudden, temporary flashes of the whole assembly.</li>
  <li><strong>Mechanical Vibration:</strong> Appears as a constant “ghosting” or “fuzziness” around the edges of the wheel and suspension.</li>
</ul>

<h4 id="driver-side-the-control">Driver Side (The Control)</h4>

<p>For comparison, here is the driver side. The edges are much cleaner, and the “ghosting” is significantly reduced.</p>

<p><img src="/assets/images/posts/wheel-imbalance/driver_vibration_diff.gif" alt="Driver Side Vibration Diff" />
<em>The difference map is mostly black until the end when you see the effect of hitting a bump.</em></p>

<h4 id="passenger-side-the-problem">Passenger Side (The Problem)</h4>

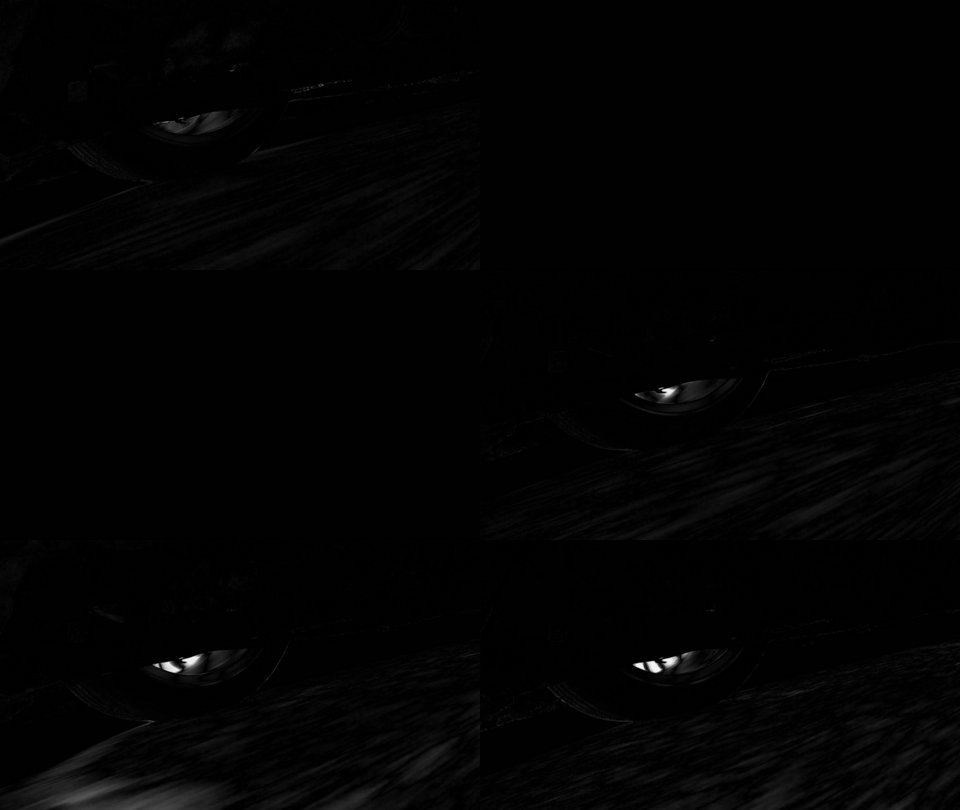
<p>Before applying any noise reduction, a simple difference map shows the passenger side, but it is extremely noisy due to compression artifacts and camera sensor noise:</p>

<p><img src="/assets/images/posts/wheel-imbalance/passenger_vibration_diff_simple.gif" alt="Passenger Side Simple Vibration Diff" />
<em>A simple frame difference without thresholding is flooded with low-level noise.</em></p>

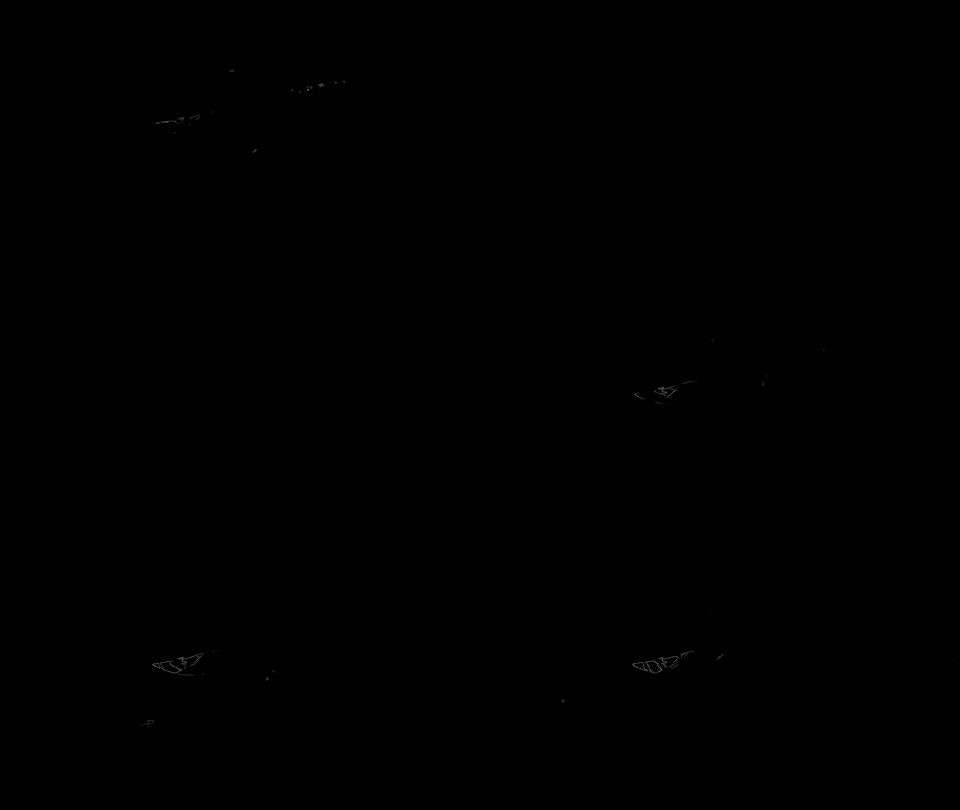
<p>To clean this up and isolate the true mechanical vibration, we apply a threshold to the filter chain. By adding <code class="language-bash highlighter-rouge"><span class="nv">lutyuv</span><span class="o">=</span><span class="nv">y</span><span class="o">=</span><span class="s1">'if(gt(val,20),val,0)'</span></code> (or <code class="language-bash highlighter-rouge"><span class="k">if</span><span class="o">(</span>gt<span class="o">(</span>val,20<span class="o">)</span>,255,0<span class="o">)</span></code> for binary contrast), we drop any pixel intensity change below a value of 20 to zero (black).</p>

<p>Here is the much cleaner result highlighting only the persistent high-frequency oscillation around the tire and control arms:</p>

<p><img src="/assets/images/posts/wheel-imbalance/passenger_vibration_diff.gif" alt="Passenger Side Vibration Diff" />
<em>The thresholded difference map cleanly highlights the mechanical oscillation.</em></p>

<h2 id="the-final-result-visual-telemetry">The Final Result: Visual Telemetry</h2>

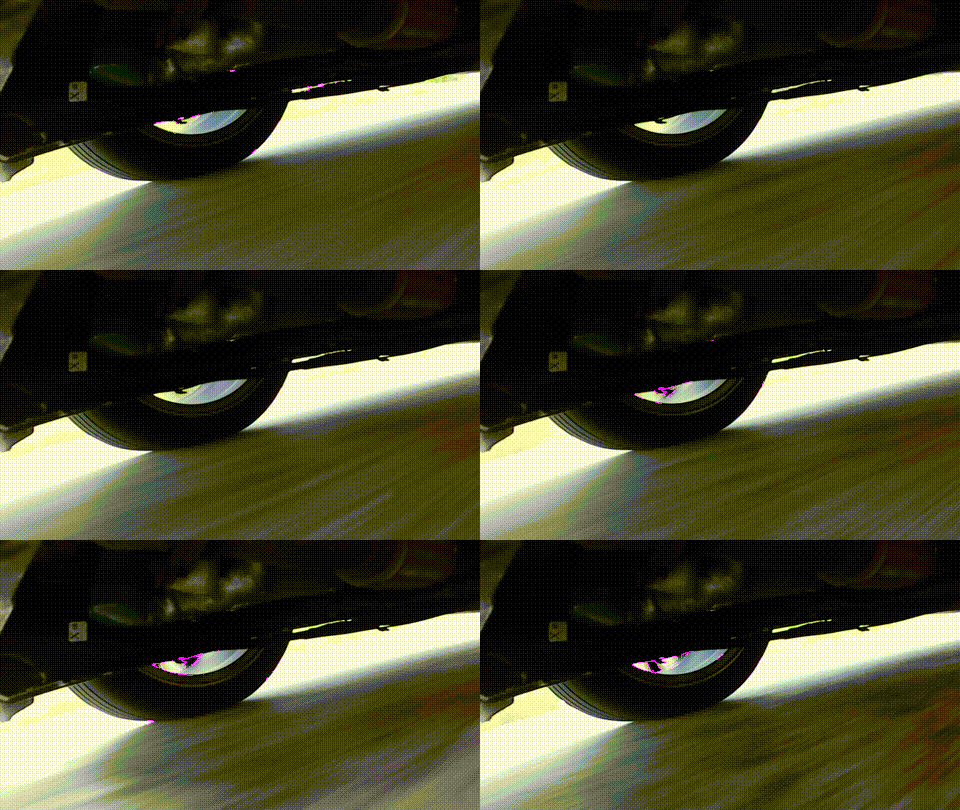
<p>By overlaying the difference map back onto the original footage and colorizing it (magenta, in this case), we get what I call “visual telemetry.”</p>

<p>To make this effective, I used a <strong>threshold filter</strong> to strip away low-level road noise and only highlight the most intense mechanical vibrations.</p>

<h3 id="the-visual-telemetry-command">The Visual Telemetry Command</h3>

<p>This is the multi-step filter chain required to isolate the movement and paint it magenta:</p>

<div class="language-bash highlighter-rouge"><div class="highlight"><pre class="highlight"><code>ffmpeg <span class="nt">-y</span> <span class="nt">-i</span> observation.gif <span class="nt">-i</span> vibration_diff.gif <span class="nt">-filter_complex</span> <span class="se">\</span>
  <span class="s2">"[1:v]format=gray,lutyuv=y='if(gt(val,20),255,0)',format=rgb24,lutrgb=g=0[magenta_mask]; </span><span class="se">\</span><span class="s2">
   [0:v][magenta_mask]blend=all_mode=lighten,split[s0][s1]; </span><span class="se">\</span><span class="s2">
   [s0]palettegen[p]; [s1][p]paletteuse"</span> vibration_overlay.gif
</code></pre></div></div>

<p><strong>How it works:</strong></p>
<ol>
  <li><strong>Thresholding:</strong> <code class="language-bash highlighter-rouge"><span class="nv">lutyuv</span><span class="o">=</span><span class="nv">y</span><span class="o">=</span><span class="s1">'if(gt(val,20),255,0)'</span></code> takes the grayscale difference map and turns any pixel with a value over 20 into pure white, and anything else into pure black. This removes the “noise” of small road bumps.</li>
  <li><strong>Colorizing:</strong> <code class="language-bash highlighter-rouge"><span class="nv">lutrgb</span><span class="o">=</span><span class="nv">g</span><span class="o">=</span>0</code> strips the green channel from the white mask, leaving us with solid magenta.</li>
  <li><strong>Blending:</strong> <code class="language-bash highlighter-rouge"><span class="nv">blend</span><span class="o">=</span><span class="nv">all_mode</span><span class="o">=</span>lighten</code> overlays our magenta highlights onto the original footage, only keeping the magenta pixels if they are brighter than the background (which they are).</li>
</ol>

<p><img src="/assets/images/posts/wheel-imbalance/vibration_overlay.gif" alt="Vibration Overlay" /></p>

<p>Notice how the magenta “glow” is concentrated on the tire tread and the suspension components. This is the smoking gun for a mechanical imbalance. Since we’ve thresholded the output, only the high-frequency oscillation from the imbalance is captured in the overlay.</p>

<h2 id="conclusion">Conclusion</h2>

<p>After analyzing the visual telemetry, I pulled off the passenger wheel for a physical inspection. The culprit was immediately clear: the passenger wheel had lost a wheel weight, becoming imbalanced at highway speeds. Once the wheel was rebalanced at the shop, the vibration was completely gone.</p>

<p>Using <code class="language-plaintext highlighter-rouge">ffmpeg</code> for this kind of visual telemetry is incredibly powerful. Instead of throwing parts at a problem, you can see the physical manifestation of the issue and isolate the root cause before taking things apart. Next time your car has a mysterious shake, grab a GoPro and start differencing.</p>]]></content><author><name>Josh Frye</name></author><category term="cars" /><category term="hardware-hacking" /><category term="ffmpeg" /><category term="gopro" /><category term="maintenance" /><summary type="html"><![CDATA[Using frame differencing in FFmpeg to visually isolate vehicle vibrations.]]></summary></entry></feed>